Nurses Guide to Wound Photography – Setting Practice Standards for Accuracy and Consistency
High-quality wound photography is a cornerstone of plastic surgery nursing practice. It provides an objective record of wound appearance, allows clinicians to track healing, supports medico-legal documentation, and reassures patients by showing visual progress.
But poor technique — inconsistent lighting, missing scale, lack of consent, or irregular timing — can make photos misleading or unusable. Nurses therefore need clear standards and a step-by-step method to ensure accuracy and consistency every time.
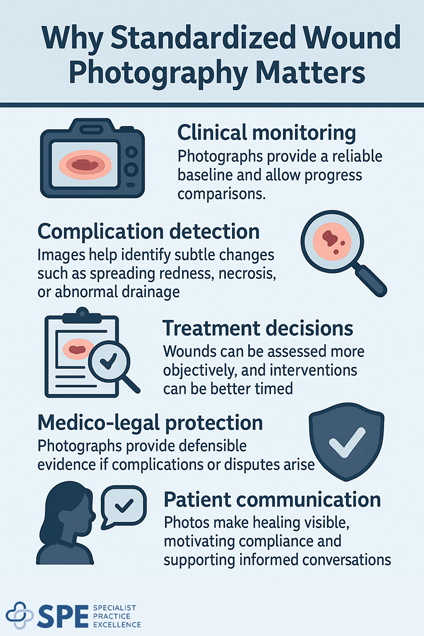
Why Standardized Wound Photography Matters
Clinical monitoring – photographs provide a reliable baseline and allow progress comparisons.
Complication detection – images help identify subtle changes such as spreading redness, necrosis, or abnormal drainage.
Treatment decisions – wounds can be assessed more objectively, and interventions can be better timed.
Medico-legal protection – photographs provide defensible evidence if complications or disputes arise.
Patient communication – photos make healing visible, motivating compliance and supporting informed conversations.
Step-by-Step Nursing Protocol for Wound Photography
Step 1: Preparation
Explain the purpose of photography to the patient.
Obtain verbal consent for clinical documentation and written consent for teaching, publication, or promotional use.
Prepare equipment: camera or approved device, measurement scale, gloves, and neutral background sheet.
Step 2: Patient Positioning
Position the patient comfortably with the wound fully exposed.
Ensure dignity by draping non-involved areas.
Use the same patient position at each session for consistency.
Step 3: Lighting
Use consistent lighting — ideally diffused, natural light or clinic-standard LED lighting.
Avoid shadows or reflections.
If using flash, diffuse it with a soft filter to reduce glare.
Step 4: Background
Place a plain, non-reflective background behind the wound (white, blue, or gray sheet).
Eliminate clutter or distracting objects.
Step 5: Framing and Angles
Take at least two images per wound:
Context view — shows wound location on the body.
Close-up — square to the wound, edges parallel to the frame.
For deep or undermined wounds, add a side-angle photo to show depth.
Maintain the same angle and distance each session.
Step 6: Scale and Reference
Place a disposable or disinfected measuring ruler next to the wound.
Position the scale at the same level as the wound to avoid distortion.
Ensure the date is recorded in the image or in the accompanying file notes.
Step 7: Image Capture
Use auto-focus locked on the wound.
Check that the entire wound is in focus — avoid blurred edges.
Take multiple shots to ensure at least one optimal image.
Step 8: Documentation and Storage
Record the photo in the patient’s notes with wound assessment data (size, exudate, odor, pain).
Store images securely in the electronic medical record.
Label with patient code, wound site, and date.
Technical Best Practices
Resolution: Minimum 6 megapixels for clarity.
Orientation: Keep camera lens square to wound.
Distance: Use the same fixed distance — some clinics mark a standard on the floor.
Consistency: Use the same device, same lighting, and same nurse positioning whenever possible.
Hygiene: Clean camera or device between patients with approved disinfectant.
Ethical and Legal Considerations
Always gain informed consent and explain how the photos will be used.
Do not photograph identifiable features (face, tattoos, jewelry) unless essential — if unavoidable, cover or crop.
Do not use personal phones unless explicitly permitted by clinic policy.
Store only on secure, password-protected systems — never on unsecured drives, cloud services, or personal devices.
Ensure images are accessible only to authorized clinical staff.
When Should Nurses Photograph Wounds?
At baseline — immediately post-op or at first wound assessment.
At scheduled intervals — weekly for acute wounds, monthly for chronic wounds.
Before and after wound interventions (e.g., debridement, dressing change, NPWT initiation).
At discharge — to document healing status.
If there is a significant change — infection signs, delayed healing, or sudden deterioration.
Do’s and Don’ts of Wound Photography
Do’s
Do use consistent angles, distance, and lighting.
Do include a scale in every close-up photo.
Do record wound details alongside the photograph.
Do maintain patient dignity during photography.
Do take extra images if depth or undermining must be shown.
Do train all staff to follow the same protocol.
Do conduct regular audits to ensure photo quality and consistency.
Don’ts
Don’t rely on memory — always use scale and documentation.
Don’t take photos without consent.
Don’t capture identifiable patient features unless necessary.
Don’t use decorative backgrounds or patterned sheets.
Don’t over-edit or filter wound images.
Don’t store images outside the clinical record.
Don’t ignore poor quality images — repeat immediately if unclear.
How Nurses Can Use These Resources in Practice
Here are medical / clinical-practice tips for wound photography. You can integrate these into protocols, training, and daily practice.
Set a Minimum Standard for Equipment
Use cameras or devices capable of at least ~6 megapixels (or equivalent smartphone resolution) for sharp detail. (not mobile phones!)
Keep consistent device(s) for the same patient over time to reduce variability.
When possible, use the same room/setup to ensure consistency.
Use Scale & Date Markers
Always include a ruler or measurement device near the wound to allow accurate size tracking.
Include date and patient identifier (but protecting privacy) so photos can’t be misattributed or mismatched.
Maintain Consistent Angle, Distance, and Viewpoints
Photograph square to wound (i.e., camera lens perpendicular to wound plane).
Use full site photo + close-up margin photo, possibly profile if depth or undermining is relevant.
Maintain same distance each time, ideally have a protocol or marker for distance (e.g. a fixed mark, or staff training to know approximate distance).
Timing of Photographs
Baseline: immediately post-op or first assessment.
At each dressing change in early acute wounds.
Regular intervals for chronic wounds.
After interventions (e.g., debridement, NPWT start).
At discharge / major milestone.
Whenever there is clinical change (infection, delayed healing etc.)
Consent, Privacy, and Storage
Obtain consent that covers how photos will be used (care, quality review, education). Document consent.
If using personal devices, ensure policies for secure storage/encryption, transfer, deletion once uploaded to medical record.
De-identify images where possible (avoid faces, tattoos).
Ensure restricted access to stored images; integrate into patient health record system rather than loose files.
Documentation & Audit
Always link photo with written wound assessment: size, depth, edges, drainage, odor, surrounding skin, well being.
Maintain logs of each photograph session (who took it, settings used).
Periodically audit photo quality to ensure consistency (lighting, focus, etc.).
FAQs on Wound Photography
General FAQs
Q: Why are wound photos more useful than just written notes?
They provide objective visual evidence of healing or deterioration, reducing subjectivity.
Q: How many photos should be taken per wound?
At least two (context and close-up), plus side views for depth.
Q: Can wound photography replace measurement?
No. Photos support, but do not replace, wound measurement and clinical assessment.
Technical FAQs
Q: What’s the best camera for wound photography?
Any clinic-approved device with at least 6 MP resolution and consistent settings.
Q: Should flash be used?
Yes, but only diffused — harsh flash can distort color and cause glare.
Q: Why is a ruler necessary?
It provides scale so wounds can be measured objectively across time.
Consent and Privacy FAQs
Q: Is verbal consent enough for clinical photos?
Yes for clinical documentation, but written consent is required for teaching, publication, or promotional use.
Q: How can privacy be protected?
By excluding identifying features and storing images securely.
Q: What if the patient refuses photography?
Respect the refusal and document it in the clinical notes.
Clinical Use FAQs
Q: How often should wounds be photographed?
At baseline, during major changes, and at regular intervals — frequency depends on wound type and risk.
Q: Do wound photos help with infection detection?
Yes, progressive photos can highlight redness, spreading, or drainage patterns.
Q: Can wound photography improve patient compliance?
Yes, patients are often motivated by seeing visible progress.
Private Practice FAQs
Q: Do patients in private practice expect photos?
Many do, especially in plastic surgery where cosmetic outcomes matter.
Q: How can nurses ensure consistency across staff?
By implementing a written protocol, training all nurses, and using checklists.
Q: Should wound photos be shown to patients?
Yes, when appropriate, to reinforce progress and support education.
Taking Action and Implementing
Wound photography is more than just taking pictures — it is a clinical skill that requires precision, consistency, and professionalism. By standardizing technique, protecting privacy, and integrating photos into the patient record, nurses can create powerful tools for clinical care, medico-legal safety, and patient satisfaction.
To implement best practice:
Establish a clinic-wide photography protocol.
Train all staff in technique and consent.
Audit wound photos regularly for quality and compliance.
Use photos alongside measurement and clinical notes for a complete record.
When nurses master wound photography, they strengthen both the science and the art of wound care — ensuring patients heal safely and outcomes are documented with clarity.
Medical References & Guidelines for Wound Photography
Reference
What It Covers / Why It’s Useful
SESLHDPR/285 – Wound Clinical Digital Photography Procedure (South Eastern Sydney Local Health District)
Detailed procedure that specifies minimum camera resolution (≥ 6 MP), when to take wound photos (baseline, peri-op, change, etc.), storage, privacy, and use of secure electronic medical records. (SESLHD)
Australian Standards for Wound Prevention and Management (4th edition), Wounds Australia
Broad framework including wound assessment, documentation standards, digital technologies, and quality expectations. Useful to align photography practices with national wound care standards. (Wounds Australia)
“Capturing Essentials in Wound Photography Past, Present, and Future: A Proposed Algorithm for Standardization” (Nursing Management, Savage et al.)
Offers an algorithm for standardizing how wound photos are taken, with details on lighting, framing, metadata, and usage. Useful for shaping your protocol. (CEConnection)
Wound Photography Protocol (QUT / PKP site)
Clear instructions on background, angle, scale, consistency, view types, and photo timing. Very nurse-friendly and detailed. (PKP)
“Quality and Reliability of 2D and 3D Clinical Photographs in Plastic Surgery: A Scoping Review” (Aesthetic Plastic Surgery, Tian et al.)
Evaluates how well 2D vs 3D photography holds up in plastic surgery settings; shows that well-done 2D can be very reliable, which is practical for most private practice settings. (SpringerLink)
Clinical Image Photography and Videography Policy (WA Country Health Service, Australia)
Ethical, legal, privacy, device and sharing policies when using photographic and video clinical images. Especially good for guidance on what to avoid. (WA Country Health)
AMA Clinical Images Guide (Australia)
Guidance on use of mobile devices, handling of images, storage, consent, and confidentiality. Helps with policy development around using phones or tablets for clinical images. (Australian Medical Association)
Specialist Practice Excellence provides Mentoring and Training on Practice Operations, Patient Lead
Generation & Enquiry Conversion for Specialist Surgeon practices in Australia, UK and USA.
Meet the Team
David Staughton
David Staughton is a Melbourne-based business growth strategist, keynote speaker, and certified consultant with 30+ years of experience across multiple industries. He helps specialist surgeons and small businesses improve operations, increase revenue, and build strong teams. David has delivered 750+ talks worldwide and holds CSP and CCEO credentials.
Michelle
Michelle Staughton is a highly experienced Practice Consultant and Operations Coach who specialises in helping specialist medical and surgical practices run more smoothly and efficiently. With extensive experience in healthcare management, she focuses on improving patient experience, streamlining clinic operations, and supporting practice growth.
Brooklyn
Brooklyn has over 8 years of experience in specialty consulting, focusing on business improvement and customer experience. She has worked in Reception, Enquiries, Consulting, and Accounts, giving her a strong understanding of the customer journey. As a mentor, she designs training programs that help teams deliver excellent service with confidence.
What We Do
SPE helps Specialist Surgeons to:
Improve practice operations
Manage time effectively
Grow income sustainably
Build stronger teams and better patient experiences